


🦾 Bionic Arm using EMG Muscle Sensor and Arduino

Original price was: ₹26,000.00.₹16,500.00Current price is: ₹16,500.00.
Arduino-based hand project with EMG (muscle sensor) input and added mechanical elbow support, here’s a technical and practical comparison between “Prosthetic Hand” and “Bionic Hand”.
📺 YouTube Video : Full Video | Short Video
- Description
- Customizations
- Whats Included !
- Reviews (0)
Description
#BionicHand #ArduinoProjects #EMGSensor #HumanoidRobotics
#FinalYearProject #MechanicalAutomation #EmbeddedSystemProject
🔧 Final Year College Projects 🎓 School Science Exhibition Models
🏆 National/State Level Competitions 🏭 Industrial Prototype Trials
🛠️ DIY & Maker Projects
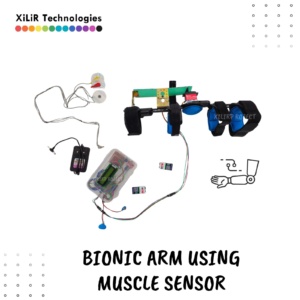
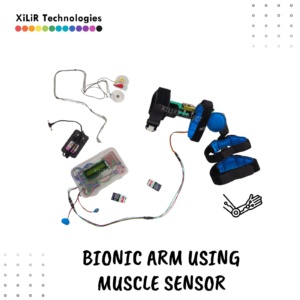
Bionic Arm/ Hand using Arduino & EMG Sensor
📘 Introduction:
The World Health Organization (WHO) estimates that there are currently more than 1 billion persons with disabilities worldwide. 80 percent of them reside in low-income nations where only 1–2 percent of the disabled population gets access to therapy. Many individuals in impoverished nations are born without hands or digits as a result of various conflicts, diseases, etc. An individual’s control, integration with the body, and feeling can all be improved with the use of bionic hands. Electromyography (EMG) signals from a group of body muscles can be used to control this system. The major purpose behind the project is to help an individual to improve the sensation, integration with the body, and the control. The development and operation of bionic hand has been explained and controlled by Electromyography Muscle Sensor.
This project shows a Bionic Hand implemented with Arduino and EMG Sensors. The EMG sensor picks up minute electrical signals generated by the muscle contractions in the forearm. These signals get filtered and amplified and are given as input to the Arduino microcontroller. The Arduino acts on the data and provides PWM outputs to servo motors fixed on the robotic hand frame. Consequently, when a user contracts their muscles, the matching servo motors spin, driving the robot fingers and simulating gestures of the human hand. This project illustrates a Bionic Hand based on Arduino and EMG Sensors. An EMG sensor picks up small electrical signals generated by muscle contractions in the forearm. These are filtered and amplified and supplied to the Arduino microcontroller. The Arduino executes the data and provides PWM signals to servo motors on the robotic hand frame. Consequently, when the user flexes his muscles, the respective servo motors turn, generating movement in the robotic fingers and mimicking human hand movement.
🔧 Objectives:
- To detect forearm muscle activation using EMG sensors and convert it into servo-driven hand movement.
- To create an intuitive robotic hand interface that mimics natural hand motions.
- To learning EMG signal processing, embedded control, and real-time actuation.
- To explore applications in wearable robotics and assistive devices for motor-impaired users.
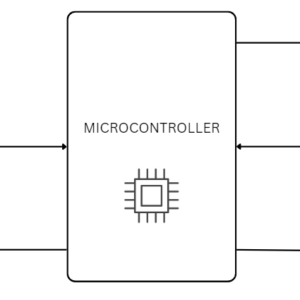
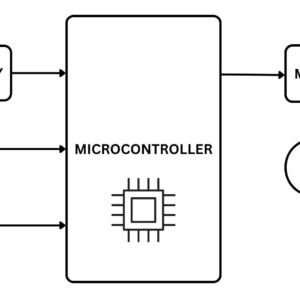
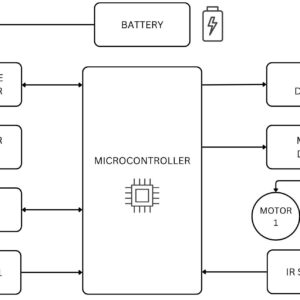
🔁 Block Diagram:
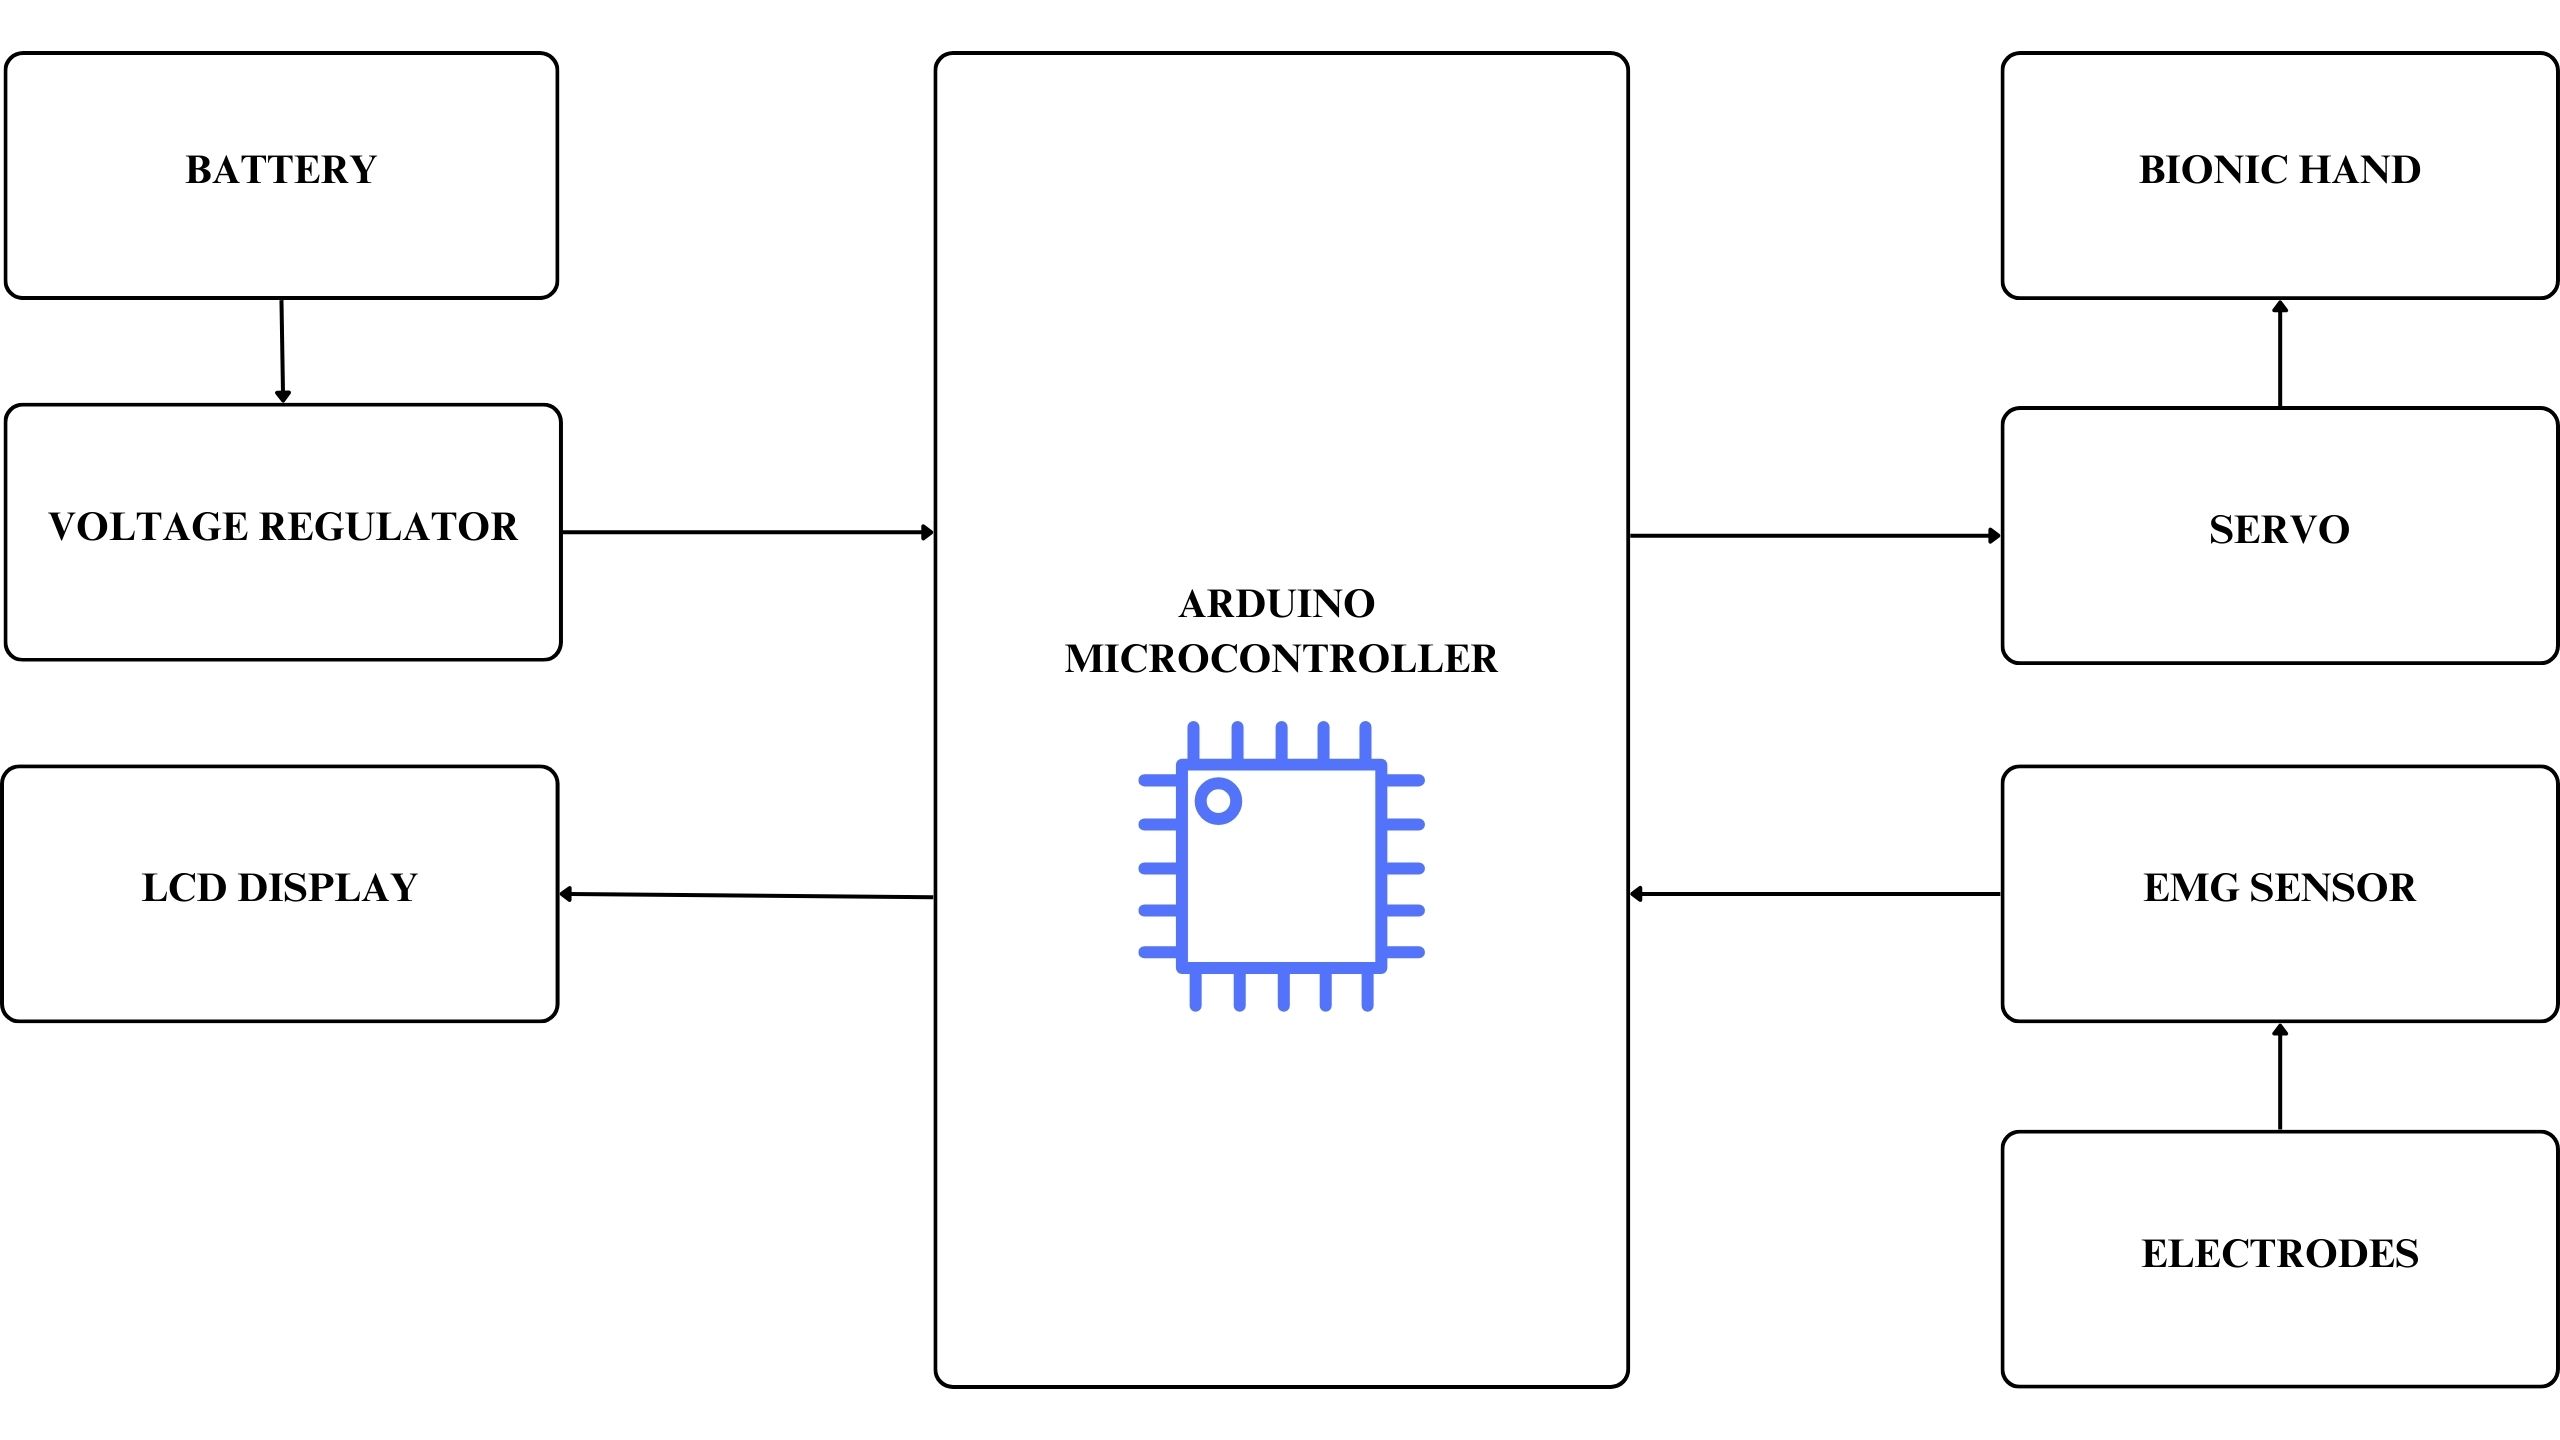
Block Diagram: Bionic Hand/ ARM using Arduino, EMG Muscle Sensor & Servo Motor
Components Required:
- Arduino UNO
- EMG Sensors
- 1 Servo Motor
- Robotic Hand Frame ( Mechanical Assembly)
- Signal Conditioning Components (e.g., resistors, amplifiers)
- Jumper Wires & Breadboard
- Power Supply
- 16×2 LCD
💻 Software Required:
- Arduino IDE (for EMG signal read, filter, mapping, servo control)
- Serial Monitor (for calibration and debugging)
Methodology and Calculations: Bionic Arm Using EMG Muscle Sensor
The methodology of the bionic arm using a muscle sensor (EMG) involves acquiring bioelectric signals from human muscles and converting them into mechanical movement. EMG electrodes are placed on the muscle to detect electrical signals generated during contraction, typically in the range of 0–5 mV. These weak signals are amplified using an EMG sensor module with a gain of approximately 1000 and filtered to remove noise. The amplified signal is then fed into an Arduino microcontroller, which converts the analog signal into digital form using a 10-bit ADC.
Digital Value = (Vin / Vref) × 1023
Where:
Vref = 5V
Example:
Vin = 1V
Digital Value = (1 / 5) × 1023 = 205
A threshold value is set to detect muscle activity:
Threshold ≈ 200
If Sensor Value > Threshold → Muscle Detected
If Sensor Value < Threshold → No Movement
Based on this condition, the servo motor is controlled to move the arm.
Angle = (Sensor Value / 1023) × 180
Example:
Sensor Value = 300
Angle ≈ 52.8°
EMG Signal Amplification:
Vout = Gain × Vin
Gain = 1000
Vin = 0.001V
Vout = 1V
Power Calculation:
Itotal = IArduino + IEMG + IServo
Itotal = 50mA + 10mA + 500mA = 560mA
Power:
P = V × I
P = 5 × 0.56 = 2.8W
Thus, the system converts muscle signals into mechanical motion effectively for prosthetic and rehabilitation applications.
🤖 Product Title Suggestions:
- Arduino & EMG-Controlled Bionic Hand
- EMG-Guided Robotic Prosthetic Hand (Arduino-based)
- Myoelectric Robotic Hand Automation with Arduino
- Bionic Hand Gesture Control via EMG Sensors
- Arduino Prosthetic Hand with EMG Interface
- Embedded Myoelectric Controlled Robotic Hand
- Servo-Driven Bionic Hand using EMG Signals
- EMG-Responsive Robotic Hand Prototype
- Biometric Arduino Hand for Science Exhibitions
- Final Year Bionic Hand Project: EMG to Movement
Keywords:
Arduino EMG bionic hand, muscle sensor based robotic hand project, EMG sensor servo motor, Arduino prosthetic arm, EMG controlled hand robotics, myoelectric control Arduino project, bionic hand exhibition model, embedded EMG robotics, Arduino wearable robotics, Robotic hand prototype, how to build bionic hand using EMG, step by step prosthetic arm using Arduino, best Arduino project for EMG sensor, Arduino emg controlled hand with elbow, DIY smart hand using muscle sensor, muscle signal controlled arm tutorial, affordable prosthetic arm using arduino, science exhibition robotic hand with EMG, engineering project with EMG and Arduino, robotic prosthesis with muscle detection
📦 Get the full working project with components list, code, diagrams & explanation
No branding on project; handmade appearance suitable for students; customizable design as per requirements.
📩 To Buy/ Make this project with training:
Contact us:
👨🏼🏭 𝗩𝗶𝗽𝗶𝗻 𝗞𝘂𝗺𝗮𝗿 𝗦𝗵𝗮𝗿𝗺𝗮
Ph.D., M.Tech, B.Tech in ECE
🎓 Lecturer 🚀 #Researcher #Drone #Robotics
WhatsApp: https://wa.me/919810326343
✅🔥 Follow us on
▶️YouTube 👥 Facebook 🐤 Twitter 📸 Instagram👨🏻🎓 LinkedIn
𝗔𝗯𝗼𝘂𝘁 𝗨𝘀:
𝗫𝗶𝗟𝗶𝗥 𝗧𝗲𝗰𝗵𝗻𝗼𝗹𝗼𝗴𝗶𝗲𝘀™ — India’s Top-rated & Leading R&D Company. ISO 9001:2008 Certified & Government-approved (MCA), established 2012.
🔧 Project Customizations (For Students)
Students can enhance or modify this project based on college syllabus, guide instructions, or personal interest.
Customizations help improve innovation, marks, and practical understanding.
Available Customization Options:
-
🌐 IoT/ AI/ ML Integration ( ThingSpeak, Blynk, Firebase, Web Dashboard etc. )
-
☀️ Solar Power Integration
-
🤖 Machine Learning / AI Modules
-
📡 GPS & GSM Based Tracking / Alerts
-
📟 Additional Sensors (as per application)
-
📲 Mobile App / Web Monitoring
-
📊 Advanced Data Logging & Graphs
-
⚙️ Hardware & Software Feature Modifications
-
🎯 Customization as per College or Guide Requirement
If you need any additional feature or modification,
📞 Contact us on WhatsApp and share your requirement.

Early Project Booking Recommended
Early Project Booking – Strongly Recommended
Students are advised to book their final year or semester project early, even with just a title or brief idea. Early booking helps us reserve your preferred topic, start documentation, diagrams, code planning, and component preparation in advance, and provide timely academic guidance.
You will receive complete documentation (abstract, report, block diagram, circuit, code explanation) well before submission. The working hardware kit will be delivered as per your college schedule. PPTs for reviews, viva, or seminars will be prepared on request.
Book early → Stay stress-free → Focus on learning.
Contact us with just the project title—we’ll handle the rest.
Whats Included !
No branding, handmade and different look as required by students.
WhatsApp : https://wa.me/919810326343
————————————
🔖 What you’ll get when you order this Project !
💯 Fully Assembled & Working Project.
🛠️ The project can be disassembled and reassembled if needed, making it easier to show progress-wise demonstrations to your guide.
📘 Includes Synopsis, Report, PPT & more.
📊 Block Diagram & Circuit Diagram – With explanations.
📦 Component Specs List.
⚙️ Working Principle Explained.
📑 Datasheets of All Components.
💻 Arduino Code + Training.
🧾 Bill of Materials (BOM) – Every item listed.
🔌 Complete Interfacing Guide – Learn how each part is connected.
🚚 Cash on Delivery Available – Safe & Secure delivery.
🎓 Viva Q&A Guidance – Be 100% ready for your Viva.
❓Need anything, Just ask us – we’re here to help! 🙌
————————————
🥇 Trusted by 20,50,000+ Students / Teachers & Innovators.
Additional Services you can buy :
Research paper, Review paper,
Plagiarism free Report with Turnitin report,
internship, industrial training/ project etc.


Reviews
There are no reviews yet.